

So you want to DIY a balloon arch. That’s a reasonable instinct. A well-built arch is one of the most impactful things you can add to a party or event, and the DIY version is genuinely achievable if you go in prepared. This guide walks you through the full process: materials, frame options, step-by-step assembly, realistic costs, and the specific points where most first-timers run into trouble.
And yes, at the end, we’ll give you an honest picture of when hiring a professional makes more sense. But that’s the end, not the beginning. First, let’s actually teach you how to do this.
Before you inflate a single balloon, gather your materials. Running out of supplies mid-assembly is one of the most common reasons a DIY balloon arch ends up looking unfinished. Over-prepare. It’s cheaper than a last-minute trip to the store when you’re already three hours into setup.
Here’s what you’ll need:
Expect to spend between $35 and $150 on materials, depending on quality and the size of the arch. Pre-packaged DIY balloon arch kits are available online and bundle most of these items together, which simplifies shopping if you’d rather not source each piece separately.
The frame is what gives your arch its shape and stability. It’s the part most people underestimate, and it’s where a lot of DIY arches quietly fail.
There are three main DIY balloon arch stand options:
A long plastic strip with evenly spaced holes. You push balloon knots through the holes to build the arch row by row. It’s lightweight, affordable, and beginner-friendly. The downside is that it produces a fairly flat, even surface rather than the full, dimensional look of a frame-built arch. Good for simple classic arches and table-level displays.
You build the frame yourself from PVC pipe and connectors, shaping it into an arch and setting each end into a weighted base. It’s sturdier than a strip, allows more dimensional balloon placement, and is the better choice for a freestanding arch that needs to hold up for hours. It takes longer to assemble and requires a few more hardware materials, but the structural result is noticeably better. For outdoor setups, especially, a PVC frame is the more reliable option.
These are commercially sold frames, usually metal or heavy-duty plastic, that come pre-shaped and ready to load with balloons. A basic balloon column and round arch rack is much more affordable than a sturdier backdrop-style frame. If you’re planning to reuse the arch for multiple events, a proper frame kit is worth the investment. For a one-time use, a PVC build or decorating strip is more cost-effective.
For most beginner DIY balloon arch ideas, a decorating strip or a simple PVC frame is the right starting point. Don’t overthink the frame choice. Pick one, commit to it, and focus your energy on balloon placement.
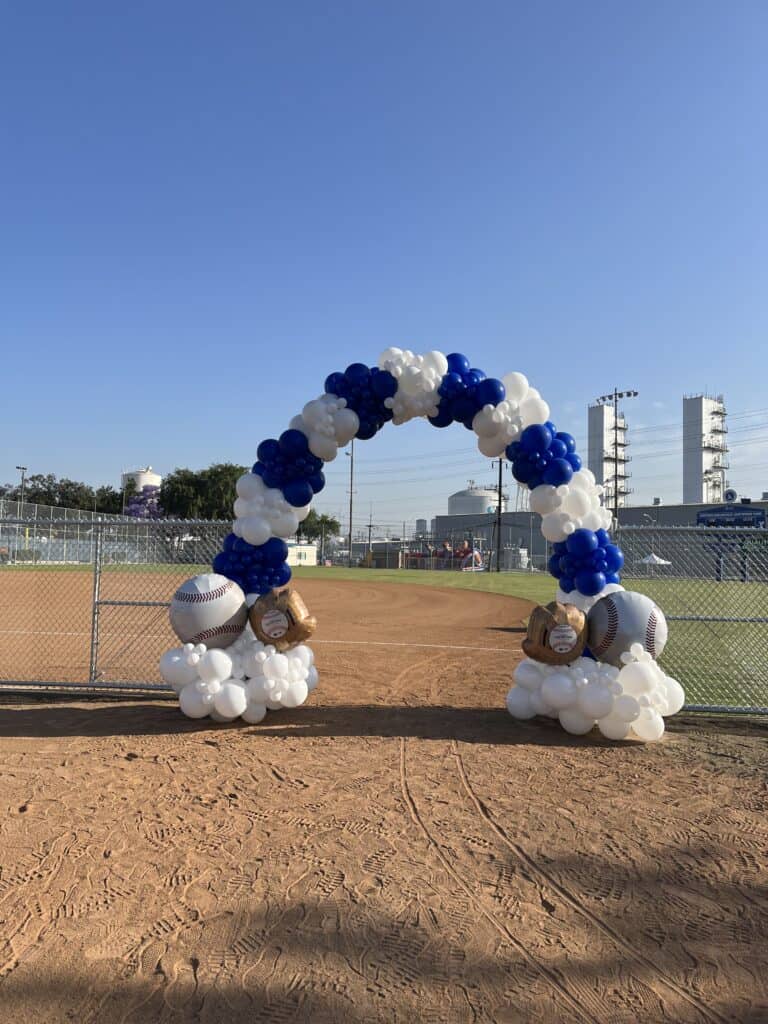
The style decision shapes your balloon count, your color approach, and how much room for error you’ll have. Two main formats dominate.
Classic arch. Balloons of uniform size arranged in a clean, repeating color pattern. Easier to execute. The repeating structure means any mistake is easy to spot and fix. It works well for entrances, formal setups, and events where a clean, structured look fits the occasion.
Organic arch. Balloons in multiple sizes and tones layered together to create a loose, textural look. This is the style you’ll see in most professional event photos and social media inspiration boards. It photographs better than a classic arch and feels more current, but it requires more judgment during assembly. Organic arches are harder to DIY convincingly, because the intentionally mixed sizes need to look considered rather than random. If you’re attempting one for the first time, give yourself more time than you think you need.
One thing worth clearing up: many people use “balloon arch” and “balloon garland” interchangeably, but they’re not quite the same thing. A garland is the organic, flowing format that drapes along walls, tables, or stairways. An arch is more structured and typically built on a frame to hold a defined shape. The build process is similar, but the end result is different. If the inspiration photos you’re working from have a loose, draping quality, that’s a garland, and you can read more about that format and what it costs in our post on how much a balloon garland costs.
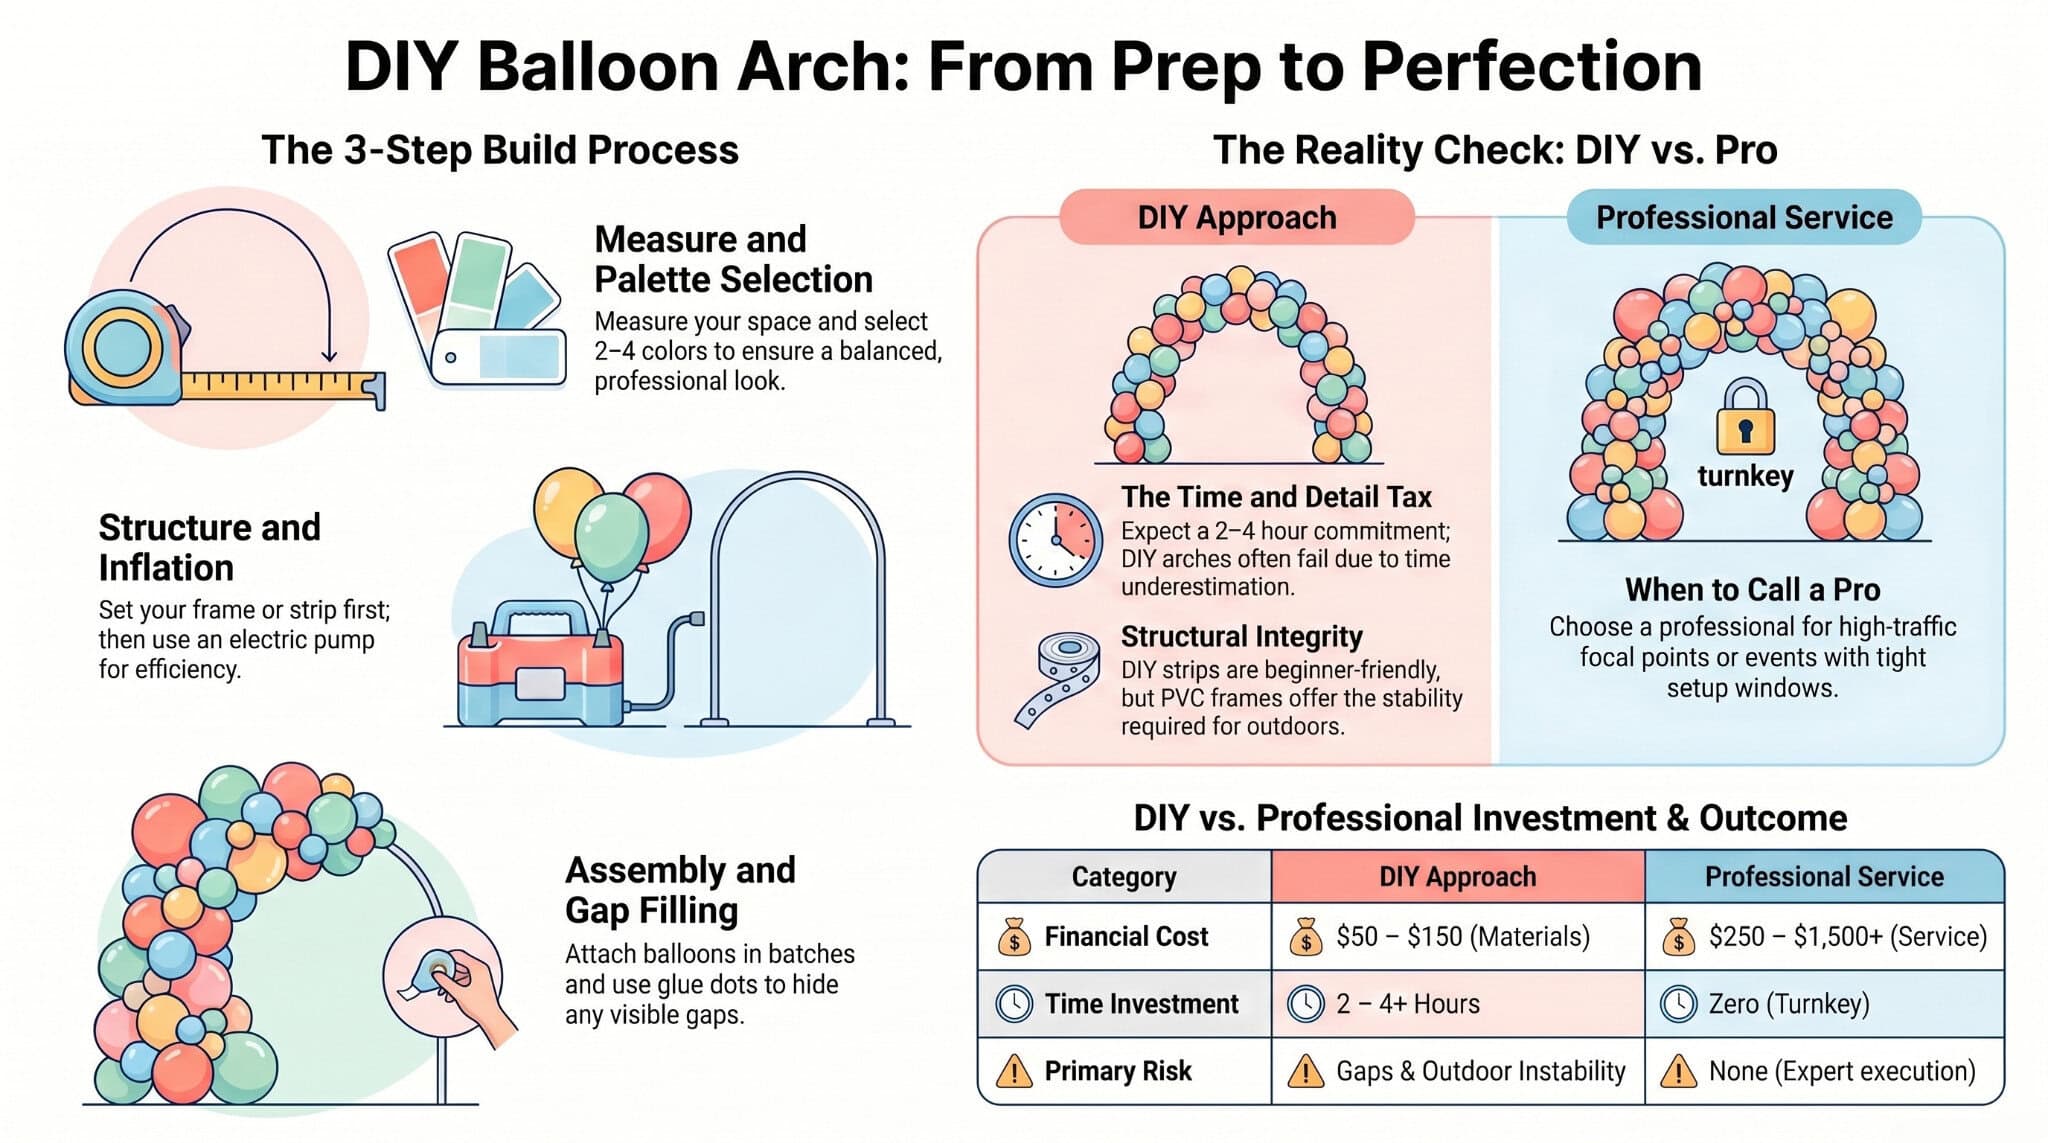
Start here, before you buy anything. Measure the height and width of the area where the arch will go. A standard doorway is about 8 feet tall, and you’ll need around 10 to 12 feet of arch material to frame it properly. Knowing your dimensions tells you what frame length to build or buy and how many balloons to order. Skipping this step is how people end up with an arch that’s either too short to reach both sides or too unwieldy to install.
Pick two to four colors. More than four tends to look chaotic in a DIY context, where controlling the placement precisely is harder than it looks. Odd-numbered color groupings (three shades rather than four) create better visual balance without requiring any special technique. Gather all your balloons before you start inflating so you can see the actual colors together, because balloon shades often read differently inflated than they do in the package.
Assemble your frame or lay out your balloon strip in position before you start adding balloons. If you’re building a PVC frame, shape it into the arch, secure both ends into weighted bases, and check that it’s stable before loading any balloons onto it. If you’re using a decorating strip, tape or hook it into its final position first. Trying to shape or move a loaded arch after the fact is significantly harder and risks popping balloons at the worst possible moment.
For outdoor setups, this is where you add extra anchoring. Sand-filled buckets, water weights, or purpose-built balloon bases all work. A frame that looks stable indoors can shift or tip as soon as wind is involved.
Inflate in batches, grouping by size as you go. For an organic arch, work with at least three sizes: small (5-inch), standard (11-inch), and large (16-inch or bigger). For a classic arch, keep everything at a consistent size for a clean result.
Attach balloons to the arch frame using balloon tape, glue dots, or string, starting from one side and working across, alternating colors and sizes as you go. Step back every few minutes and look at the full arch from a distance. Gaps and thin patches that seem minor up close look significantly more obvious once the arch is installed and lit.
Once your arch is substantially assembled, gently bend it to preview the shape. If you notice gaps, inflate a smaller balloon and press it into the empty space. Glue dots hold filler balloons securely without tying. This step takes longer than people expect, and it makes a real difference to the finished look, so don’t skip it.
For a wall-mounted arch, use strong Command hooks on both sides at your target height, and thread the strip or frame ends behind the hooks. For a freestanding arch, double-check that your bases are weighted before you walk away from it. The last thing you want is an arch tipping over an hour before guests arrive.
The materials price is only part of the real cost. Here’s an honest breakdown.
Materials:
In total, a first-time DIY balloon arch realistically costs $50 to $150 in materials. And then there’s the time. Plan for 1 to 2 hours of assembly for a standard arch — though first-timers often find it runs longer once you account for inflation, gap-filling, and installation.
For context on the professional side: the average professional balloon arch in 2026 ranges from $250 to $1,500 depending on size, design complexity, materials, and location, with large custom or corporate installations running $2,500 or more. In Los Angeles, where labor and materials costs run higher than national averages, professional arch pricing tends toward the upper half of that range. Our detailed post on how much a balloon arch costs breaks this down further if you’re trying to decide which direction makes sense for your budget.
Most DIY balloon arches don’t fail because the technique is wrong. They fail at specific, predictable pressure points.
Cheaper balloons inflate to different sizes even within the same bag, which makes the finished arch look lumpy rather than full. Spending a little more on consistent-quality latex is one of the highest-return decisions in the whole build.
The tutorials make this look fast. It isn’t, especially the first time. If you’re also managing catering, guest logistics, or any other event prep on the same day, building a three-hour arch into that timeline introduces real risk.
Wind and direct sun are the two biggest threats to a balloon arch’s longevity. If your event is outside, install the arch as close to the start time as practical, not the night before. Build in extra anchoring from the beginning, not as an afterthought.
Gaps that appear after the arch is installed are much harder to fix in place than they are on the ground during assembly. Build the arch slightly fuller than you think you need it, then edit down if necessary. Sparse arches are harder to rescue than dense ones.
DIY is genuinely the right call for some situations. A smaller home celebration, a setup where the arch is a fun accent rather than a focal piece, or an event where the building process itself is part of the fun. Those are all legitimate reasons to go the DIY route.
But there are situations where a professional is clearly the better decision.
If the arch is the primary visual element guests will photograph all night, the quality difference is visible and it matters. If you’re working in a venue with restrictions on what can be mounted to walls or hung from ceilings, a professional knows how to navigate that. And if your event already involves coordinating catering, vendors, and a tight timeline, adding a multi-hour build to your plate on the same day is a real risk, not just an inconvenience as stated earlier.
The Balloon Guy designs and installs professional balloon arches across Los Angeles, from intimate backyard birthdays to large venue events. We also build balloon backdrops, balloon columns, and full event decor packages for birthdays, weddings, corporate events, and more. If you’ve looked through the steps above and decided you’d rather have it handled, that’s what we’re here for.
Yes, and most DIY arches use air-filled balloons attached to a frame or strip rather than helium. Air-filled balloons also last longer than helium-filled ones, so they’re the better choice for most event setups. Helium is typically used for floating balloon clusters or bouquets, not for structural arches.
A standard doorway arch takes 100 to 150 latex balloons across a mix of sizes. Buy at least 10 to 15% more than your estimate to cover balloons that pop during inflation or inflate unevenly. Running short mid-assembly is a very common first-timer experience.
A well-built air-filled arch holds its shape for 24 to 48 hours indoors. In heat or direct sun, it’ll deflate faster, sometimes within a few hours. Install as close to your event start time as practical, especially for outdoor setups.
An arch is structured, usually built on a frame, and holds a defined curved shape. A garland is organic and flexible, designed to drape along a surface rather than stand on its own. Garlands are often easier to DIY. Arches require more frame planning and anchoring. If your inspiration photos show a loose, draping installation, you’re probably looking at a garland, not an arch.
A freestanding DIY balloon arch needs a frame, usually PVC pipe bent into an arch shape and secured in weighted bases, or a commercially sold arch frame kit. The bases need to be heavy enough to keep the arch upright for the full duration of your event. Sand-filled buckets, water weights, or purpose-built balloon base stands all work. For outdoor setups, go heavier than you think you need to.
If you’ve made it through this guide and decided you’d rather hand this off to someone who does it every day, we’re happy to help. The Balloon Guy works with clients across Los Angeles on balloon arches, garlands, backdrops, and full event decor, from small birthday celebrations to large-scale venue installations.
Get in touch with The Balloon Guy and tell us about your event. We’ll take it from there.

Inquire
Tell us when and we'll take it from there. A member of our Los Angeles team will reach out to talk through your vision, venue, and budget.
Planning an event?
Tell us your date and vision. Our team texts you back within minutes.
 4.9 on Google · 68 reviews
Luxury Balloon Decorations & Event Entertainment in Los Angeles. The Balloon Guy creates custom balloon decorations, luxury balloon installations, and professional event entertainment for corporate events, brand activations, weddings, birthday parties, private celebrations, and community events throughout Los Angeles and Southern California.
189 The Grove Dr
Los Angeles, CA 90036By appointment only · Serving Los Angeles & Southern California
Mon – Sun · 9:00 am – 6:00 pm